Saturday, May 9, 2015

Lyrical Livelihood


At the moment, my favorite song would have to be If I'm James Dean, You're Audrey Hepburn by Sleeping With Sirens. It's basically about someone to is asking someone they love to stay with them. They know that everything isn't perfect and that they will have problems, but they will always be able to work it out. The lyrics make me feel that throughout your whole life you have relationships with people. Relationships with family, friends, and lovers. It reminds me that there are always hard times, but no matter what you have to work hard and remember that you have to get through it for the people that you love.

The music video song that my partner, Neliza Iannuzzi, and I chose is Roger Rabbit by the band Sleeping With Sirens. Choosing the song was a hard decision to make, but eventually we chose the song. We chose this song because it is relatable to almost everyone. Everyone has gone through a problem at least once in their life whether it was minor or big. Most of the time when you have a problem you ask someone for help or advice, but they can't really fully understand the situation unless you can fully understand it yourself.

Throughout the music video you will see that Neliza has a problem and she comes to me for help. I cannot understand her situation and I can't really give her advice on it. After we stop talking she realizes that she has to fully understand the situation before she can expect someone else to understand it. In the end she starts to understand the situation and she begins to solve it.

Friday, May 8, 2015

Animation Outtakes


Bouncing Ball GIF 
I am doing this animation project with three of my classmates. They are Kyler Sukehira, Nathan Gardner, and Charles McConnell. Kyler is a hard working student. He's always determined. Nathan is creative and came up with good ideas during the project. Charles likes to skate.

Stop motion is an animation that includes an object that is moved by someone every time there is a new frame. Stop motion is usually done with clay or just an object you can find anywhere and take a picture. Someone is supposed to move the object, take a picture, and just do that over and over again so it looks like the object is doing something when you put them all together in order. .GIF stands for Graphics Interchange Format. It is a format that supports up to 8 bits per pixel for each image. When you see it, it will just play over and over again. It is almost like a video, but it has no sound.

In our animations my teammates and I are telling all our stories. I'm pretty sure all of us have seen litter and not just at a beach, but anywhere. Our animation tells a story about Nathan and how he sees a tourist littering at the beach. He then goes to his community and gathers a group that will help to stop the littering and pick up the trash. The audience should care because littering has become a big problem on Earth. It is everywhere. In the ocean, the mountains, and of course in the cities. If people pitched in and helped it could all make a difference.                                                        

Friday, May 1, 2015

Our Animation Story


The focus statement that my team and I chose is "Nathan Rescues Marine Life." This statement tells "my story" because I go to the beach sometimes and notice the litter. Unfortunately I don't do anything about it because I do not want people to think of me in a certain way. I thought that this was a good idea because showing people that it is good to stand up for what you believe in. Pollution is a big issue on Earth and this video is just a little contribution to showing that it is okay to help.


Just by reading the focus statement you can probably tell a lesson that the audience will learn. My team and I wanted to send out a message about how litter and pollution injures and even kills the marine life. We want the audience to know that by throwing away your trash and recycling your cans and bottles you can help to save marine life and prevent animals in the ocean from dying. The audience can learn this lesson by watching Nathan and the people he gets from the community help to pick up the trash on the beach.

There were many moments during the making of this project, some good some bad. The worst moment would probably have to be, in my opinion, the editing. I think this because of how many choices we had in iMovie. A couple people wanted certain things and others wanted other things. It took a while, but we finally settled on what we had on the video. Our best moment, in my opinion, would have to be the filming. During the filming there were complications, but it was the least complicated part throughout the whole process. 

Friday, April 10, 2015

Typography Images

Alexander Graham Bell
Mrs. Sanderl
Typography is the art of arranging letters and words to make a certain image. It can be used to make an image like a portrait. A a typography image can make a lasting impact by showing someone a new type of art. It can also make a lasting impact by giving someone a new way to view object and even people.

Me
My biggest challenge during the typography project that was the picture of me was the colors and trying to make the image looks like me. Although towards the end I could never make the image look like me it was still the biggest challenge for me. I could never fully overcome the issue, but I did make it look better. I think that in order to make the image better I had to play around with the colors of the words and highlights and the midtones. Again, I am disappointed with the way it turned out and I know I could have done a lot of things to make it look better.

In total, I have 3 examples which are of an art teacher in my school, Mrs. Sanderl, a famous innovator, and me. There are many differences between the 3 examples. The typography image of Mrs. Sanderl was one of the easier ones to make and also my #1 favorite out of all of them. The white background and colors look good together and it is very easy to tell that it is her. The typography image of the famous innovator, Alexander Graham Bell would be my second favorite out of the 3 examples. In this typography image it is also easy to see his face. In this particular image the class had to make it only black & white. And last but not least is the typography image of me. I would say that this one is my least favorite because of a couple things. 1) It looks nothing like me and 2) I did not put a background color which probably would have made it look better.


Tuesday, March 3, 2015

Double Exposed Portraits

Multi Exposure
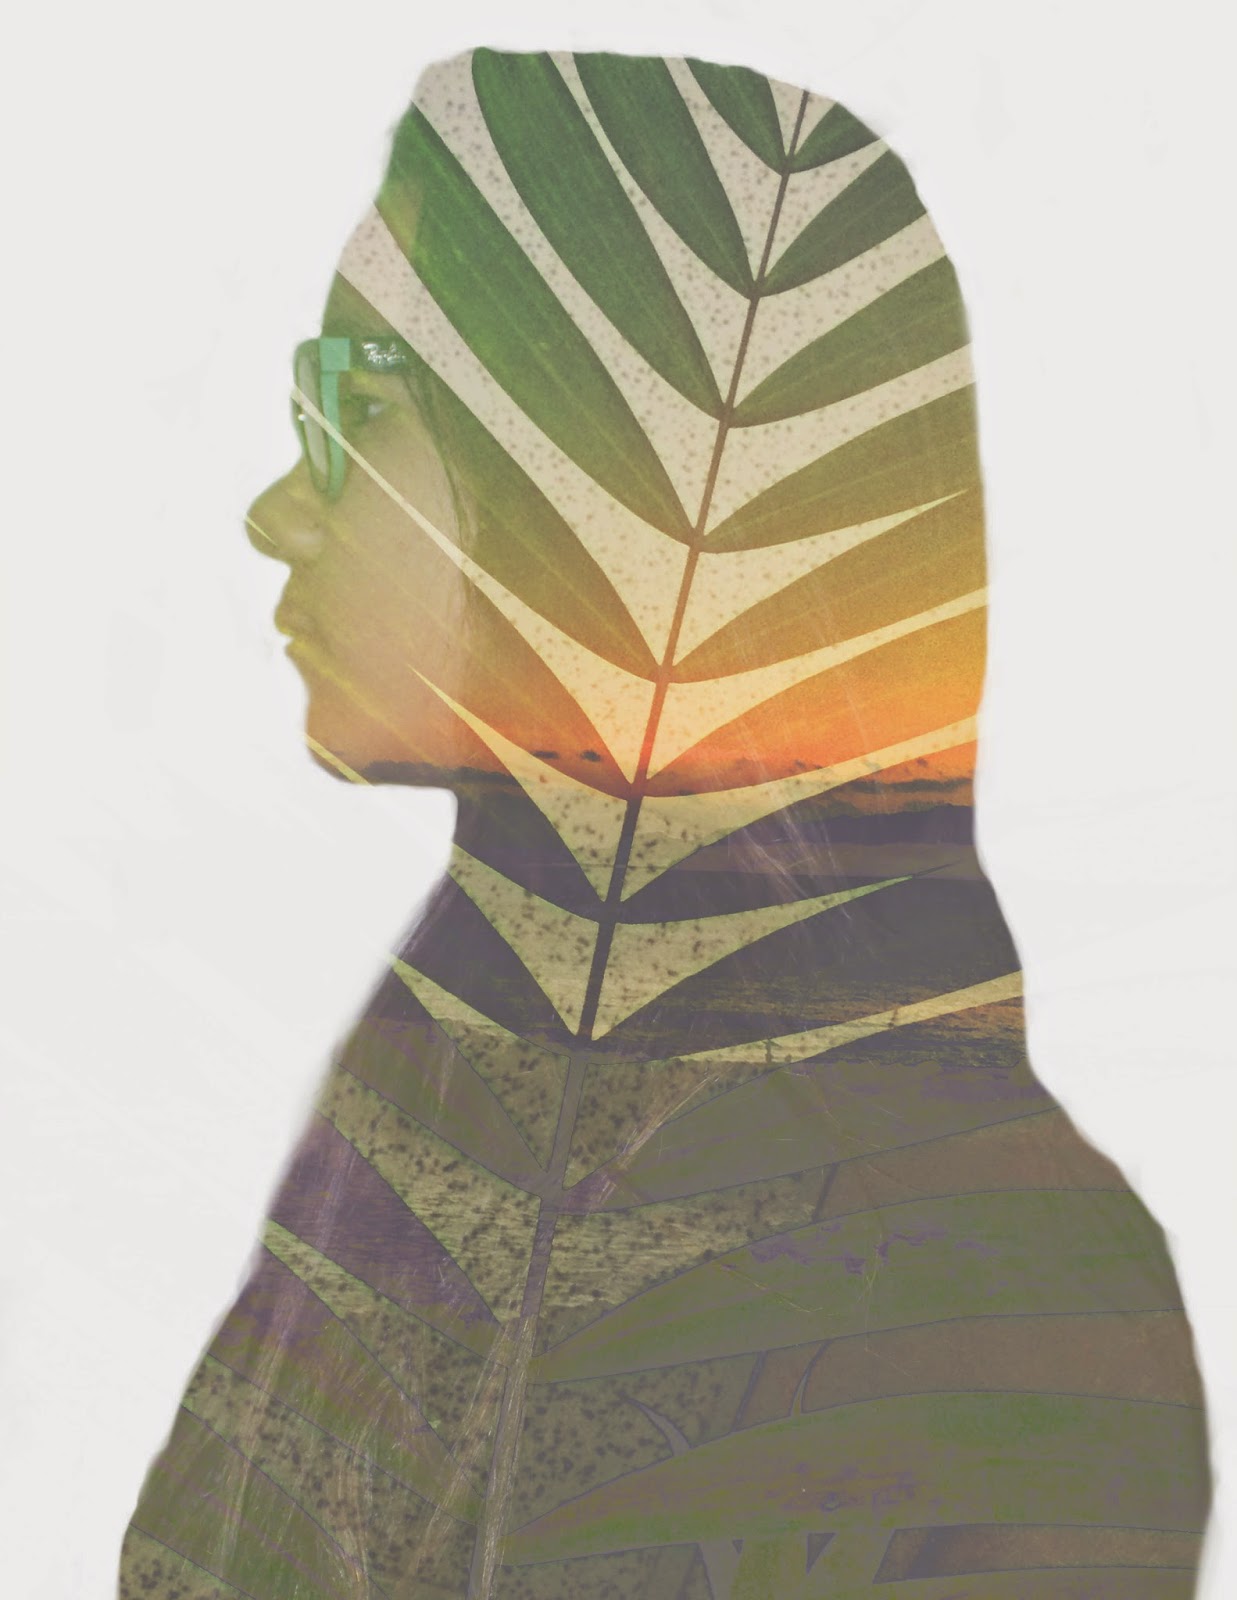
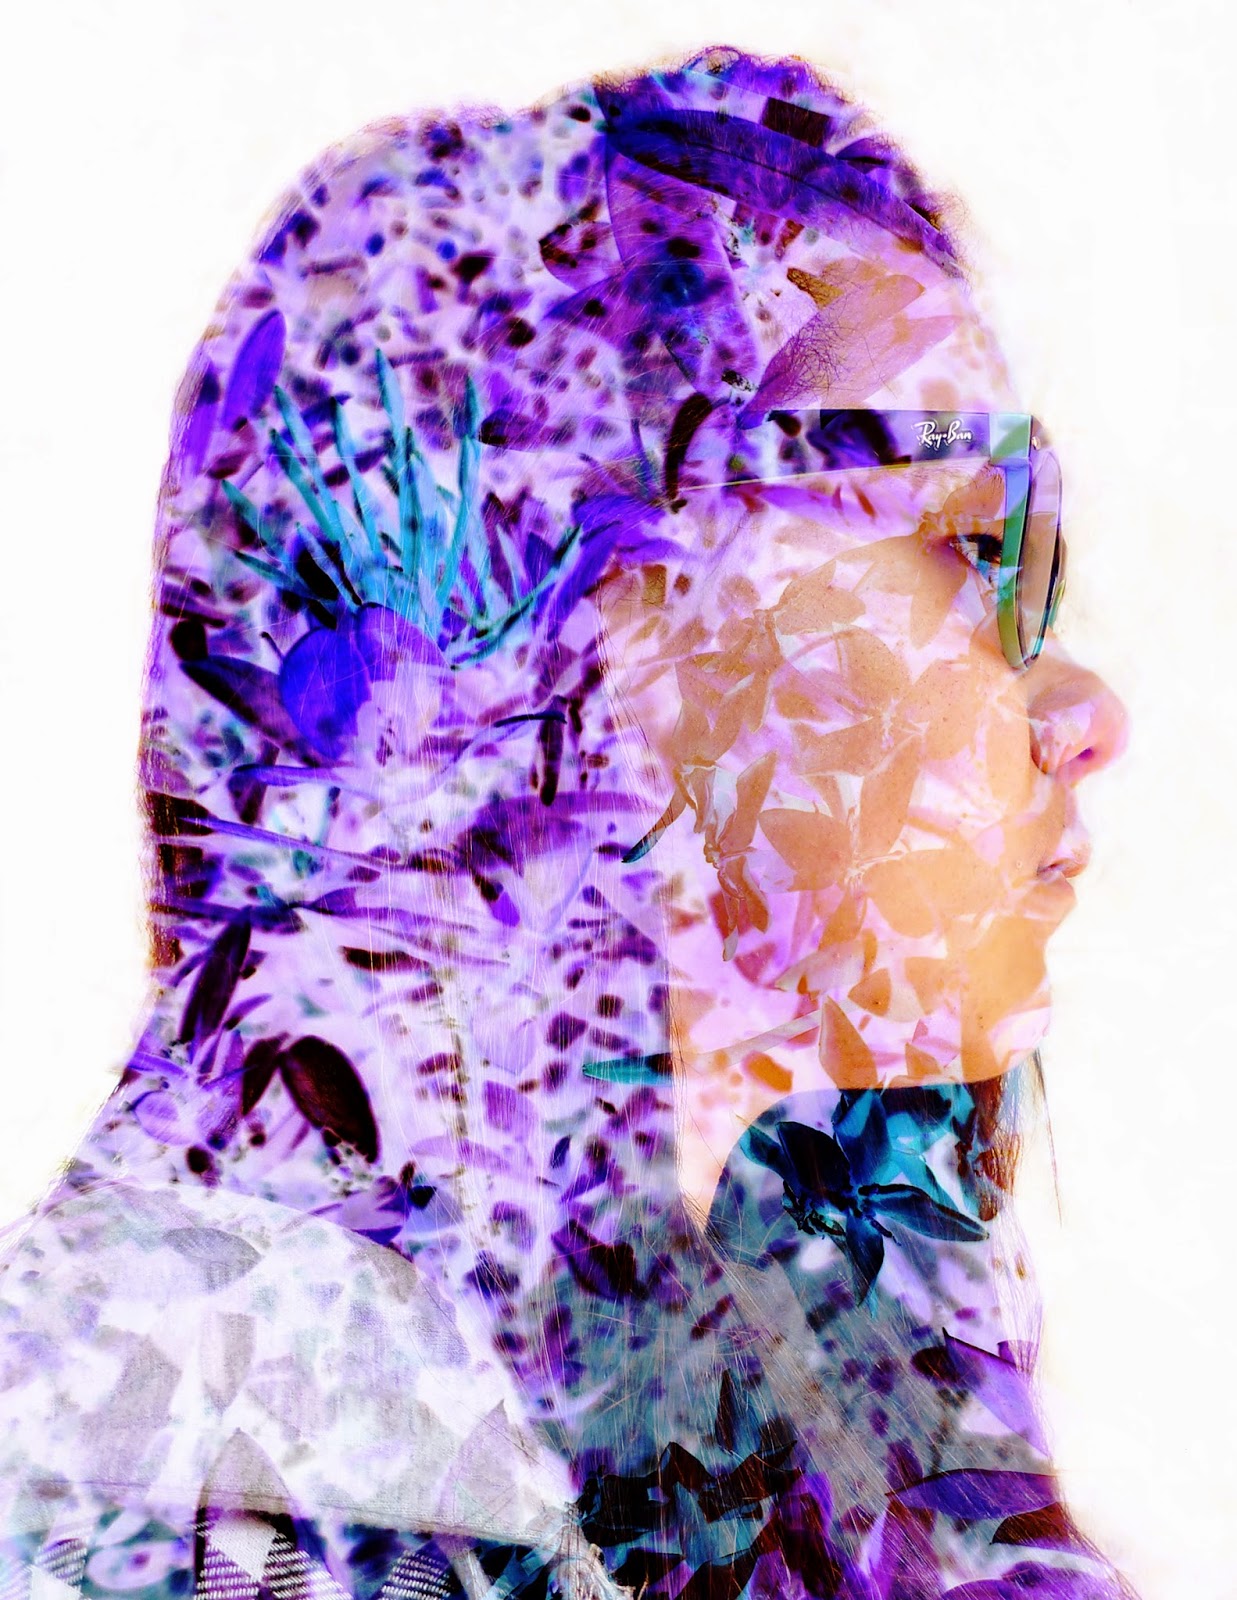
Portrait photography is a type of photography that shows a person or group of people that displays the mood and personality of the subject. A majority of the time, portraits just show the subject's face, but this can include the body and background. Profile view and silhouetting are very different from portrait photography, but at the same time they relate. Silhouetting is the act of casting or showing the subject as a dark shape or shadow against a lighter background. It is used in the Double Exposure project that my class is doing.

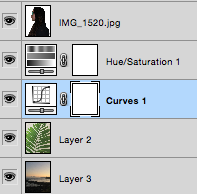
Double exposures are by created in Photoshop by opening the program and going to File > Scripts > Load Files Into Stack. You choose the pictures that you would like to use and then you wait for the program to load them into a stack. It will not take too long, but when they do come up they may not all be the same size. If you took your pictures on devices like a phone camera then they may or may not come out very small compared to the other pictures. If they are small then you have to enlarge them using the move tool. Remember to always hold down Shift while you are sizing a picture or else when you are done it will look distorted. After you resize the images you have to crop the profile picture of you or the main subject of the picture. You use the Crop tool and be sure that it is sized to 8.5" by 11". Like a sheet of paper. While cropping the image keep in mind that you have to have an equal amount of space between the back of the subject's head and their nose. You have to have space between the top of the subject's head and the top of the frame. You then have to go to the Dodge tool and heighten the exposure around the subject's face and body until the background is either completely white or almost completely white (your choice). In order to see all of the pictures that are behind the profile picture you have double click each layer and go to the settings. After that you have to go to the Blend Mode and change it from "Normal" to "Screen."  Then, to make it your own you are going to go to Layer > New Adjustment Layer. When you are there you can choose from many different layer adjustments that you can add to the double exposure.

The symbols that I used in my two visual examples are a plant leaf and a sunset. Now, part of the assignment was to use two or more pictures that symbolized you. I used two pictures. The plant leaf symbolizes my love for nature. I've always loved nature and the beauty that it shows. I've always wondered how much there is to discover in nature. I've always been one to explore and discover. Behind the leaf there is a sunset at a beach. When I chose to use the sunset I was thinking about how sunset represents the end of the day. For me everyday is an adventure and every sunset is the end to another adventure for me. I do think that in order to make my picture better I could have maybe found better symbols.

Double Exposure

Multi Exposure Layer Adjustments

Friday, January 30, 2015

HDR Photography


Hello. For this project in GT we are doing a little something called HDR photography. First, let's talk about the meaning of "HDR photography." HDR photography is the act of taking several different pictures with different exposure settings to put together into one photo so that you can see everything in the photo. From the sun to the trees. The HDR in HDR photography stands for high-dynamic-range, and that's kind of self explanatory. I myself really like the idea of HDR photography. It's a really cool way to get everything in the picture clearly.
In order to make an HDR image, the first thing that you have to do is find something that you want to take a picture of. When finding something to take a picture of the first thing I recommend you look for is a subject that is almost, or is, completely still. You then have to take seven separate pictures with the exposure changed in each one. The different exposure levels that you use for the pictures are either -3 to +3. Be sure that when you are doing this to make sure that you are not moving the camera, because all of the pictures have to be in the exact same place. When you have all of your pictures together, then you have to get the set of pictures that you think are the best and get them on your computer. You will open Photoshop and go to File > Automate > Merge to HDR. From there you will press "Browse" and select your pictures. Before you press okay you have to make sure that the little box in the corner is checked. Next to the box it should say "Attempt to Automatically Align Source Images." It may take a while to load because program is trying to align all of the pictures as great as possible. When it is done you can edit the picture as you like so it is to your liking. When you are done press okay and you have your masterpiece.

While I was taking the sets of pictures for my two HDR pictures I really had a good feeling about them. It was kind of hard to do the experiment because I kept accidentally moving the camera too much while changing the exposure, but other than that the whole project went really well. I do think that this was a fun school project and it's definitely something that I can do on my free time outside of school. 

Friday, January 23, 2015

Movie Trailer Critique


For this project in G.T. we have done a movie trailer. Our movie was called "The Missing." It was about a girl, Violet, and friends. While walking home together the girls soon find out that they are being followed, and in order for the girls to be safe Violet ends up having to risk her life. The rest of the girls go on a journey looking for their friend. My teammates were Nahele Keale, Jasmine Laplante and Jaesha Mata. Together we went over to Nahele's house and filmed. I acted in the trailer along with my other teammates. Our teacher also gave us a Trailer Plan to complete and we had to out in things like a movie summary, voice acting script, etc.

The requirements were the trailer had to be 1:30-2:30 minutes long, there had to be text layovers, five scenes, voice acting script, dialogue, foley, poster image, and we had to have the audience in mind. Our audience was 1st and 2nd graders. I do not think that we completed all of the requirements. We completed all of them except for the foley and keeping the age of the audience in mind. Other than the foley and audience I think the completed all of the requirements.

For the class critique our teacher, Mr. Sanderl played the Movie Trailer for the whole class and they decided whether or not it was appropriate for the audience, creative and whether or not we included all of the requirements. In my opinion, the results that we got were fair. Considering how much we worked and how much effort we put into doing the trailer, I think that my teammates and I did a good job. It came put out much better than I thought it would.